Essential Ingredients for Perfectly Fluffy Gnocchi
Choosing the Best Potatoes for Light and Airy Gnocchi
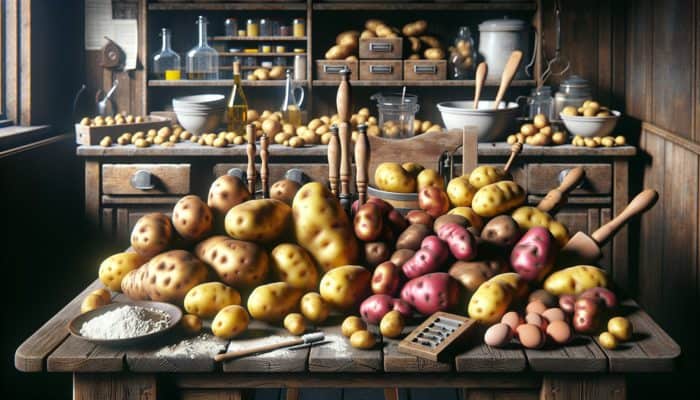
Starting your culinary adventure into the realm of homemade gnocchi necessitates a critical decision regarding the selection of potatoes. Opt for starchy varieties such as Russets or Yukon Golds, celebrated for their elevated starch levels. This specific characteristic is paramount as it contributes to achieving a light and fluffy texture in the gnocchi. When these potatoes are boiled, they develop a tender consistency that mashes beautifully, leading to a soft, pliable dough that is quintessentially airy. It's imperative to steer clear of waxy varieties like Red Bliss or new potatoes, as these typically contain higher moisture and lower starch, resulting in denser, heavier gnocchi that do not embody the desired lightness.
Following your selection, inspect the potatoes meticulously to confirm they are firm, unblemished, and devoid of sprouts. The overall quality of your potatoes profoundly impacts the final dish, so always choose fresh, top-grade options. Many culinary traditions advocate for the use of freshly harvested potatoes, as they deliver a freshness that older varieties cannot replicate. Furthermore, the type of potato you select may reflect varying regional cooking styles, from traditional Italian gnocchi to innovative South American interpretations, highlighting the global admiration for this adaptable dish.
Recognising the Role of Flour in Crafting Gnocchi
When it comes to selecting flour, all-purpose flour emerges as the preferred choice for crafting the ideal gnocchi. It strikes a harmonious balance between gluten content and structural integrity, ensuring the dough retains its shape during cooking while sidestepping excessive density. For those with gluten sensitivities, alternative flours like chickpea flour or gluten-free blends can serve as suitable substitutes, although the resultant texture and outcome may differ from traditional preparations.
The proportion of flour to potato is vital in achieving the perfect texture. A general recommendation is to utilise approximately one cup of flour for every medium potato, although this may vary based on the moisture content in your potatoes. It’s crucial to add flour gradually, mixing until the dough achieves a soft yet non-sticky consistency. This careful approach guarantees that the gnocchi remain light and fluffy, avoiding a gummy texture. In certain culinary regions, incorporating semolina flour can also introduce a unique texture, reflecting the rich diversity of global gnocchi-making traditions.
Enhancing Gnocchi Dough Texture Through Egg Inclusion
Integrating an egg into your gnocchi dough not only serves as a binding agent but also significantly enhances both the flavour and texture of the resulting product. The moisture derived from the egg contributes to a tender and cohesive dough, making it simpler to shape into the classic pillowy forms. This technique is widely adopted in traditional recipes from northern Italy, where the use of eggs is customary to elevate the dish’s overall quality.
If you seek a vegan alternative or prefer to omit eggs, consider using substitutes such as flaxseed meal or aquafaba, though it’s essential to recognise that the texture may vary. Understanding how any alterations to the recipe might affect the overall moisture content and texture of your gnocchi is crucial. Mastering the role of each ingredient is key to perfecting the art of making homemade gnocchi easily.
Preparing Potatoes for Gnocchi Production

Boiling Potatoes for the Optimal Gnocchi Texture
Commence your gnocchi-making journey by boiling whole, unpeeled potatoes. This technique is advantageous as it retains moisture, resulting in a fluffier final texture. Ensure that the potatoes are boiled until they are tender and can be easily pierced with a fork. Depending on their size, this process may take anywhere from 20 to 40 minutes. It's crucial to monitor them closely to avert overcooking, which can lead to waterlogged potatoes and, ultimately, gummy gnocchi.
This boiling method has been treasured through generations and is utilised in various culinary traditions. For instance, certain Italian regions recommend steaming the potatoes instead of boiling to maintain their natural flavours and textures. Regardless of your preferred method, remember to peel the potatoes while they remain warm. This practice simplifies the peeling process and guarantees a smooth mash, free of lumps that could disrupt the texture of your gnocchi.
Perfecting the Art of Mashing Potatoes
The subsequent essential step involves thoroughly mashing the boiled potatoes to create a smooth, lump-free base for your gnocchi dough. A potato ricer or a traditional masher can effectively achieve this goal, but the objective is to attain a silky consistency. Engaging in the mashing process can be quite therapeutic, allowing you to connect with the ingredients and the nuances of your dish. It’s imperative to act quickly, as warm potatoes absorb flour more readily than cold ones, facilitating a smoother mixing experience.
Many chefs advise passing the potatoes through a sieve after mashing to attain an ultra-smooth texture, which can elevate your gnocchi to a refined level that is sure to impress. Remember, the smoother your mashed potatoes, the smoother your final gnocchi will be, resulting in a delightful mouthfeel that enhances the overall dining experience.
Cooling Mashed Potatoes for Optimal Ingredient Integration
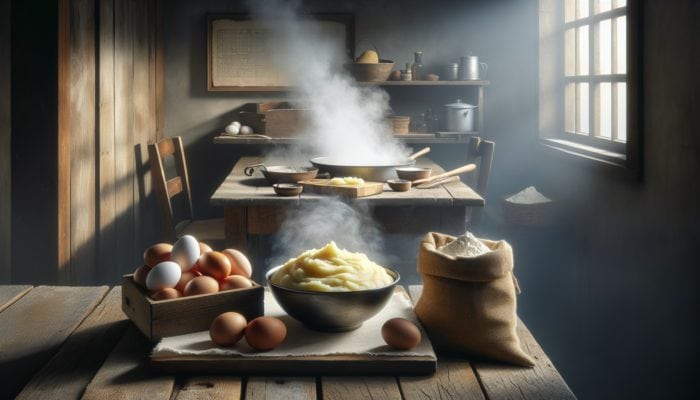
Post-mashing, it’s crucial to allow the potatoes to cool slightly before integrating the egg and flour. This cooling phase is essential to prevent cooking the egg, which could adversely affect the texture and moisture content of your gnocchi. Allowing the potatoes to cool also facilitates better ingredient integration, resulting in a cohesive dough.
This often-overlooked step is one of the most critical aspects of making homemade gnocchi easily. By dedicating time to this practice, you not only enhance the final product but also exhibit a keen understanding of how each component interacts throughout the cooking process. Consider this a moment to reflect on the balance of your ingredients, preparing for the creation of gnocchi that truly exemplifies the beauty of your culinary journey.
Crafting the Ideal Gnocchi Dough
Combining Ingredients to Form the Gnocchi Dough
Creating the dough is a pivotal milestone in your gnocchi-making adventure. Begin by blending the warm, smooth mashed potatoes with the all-purpose flour and a beaten egg. It’s beneficial to create a well in the centre of the potatoes, gradually incorporating the flour and egg. This method allows you to assess moisture levels more accurately, ensuring that your dough achieves the desired consistency. The mixture should coalesce into a soft, pliable dough that is neither overly sticky nor too dry.
While mixing, you may prefer to use your hands or a wooden spoon, but many traditional cooks favour the tactile experience of working with their hands. This connection to the food can be profoundly rewarding, enabling you to feel the texture of the dough as it transforms from a mixture of ingredients into an elegant, cohesive dough. It’s vital not to overwork the dough, as this can lead to excessive gluten development, ultimately resulting in denser gnocchi.
Kneading the Gnocchi Dough for a Light Texture
Once the dough has come together, it’s time to knead it gently. This step is critical for developing a light texture in your gnocchi. Gently press and fold the dough, being careful not to over-knead, as this can lead to toughness. Kneading should only take a few minutes—just enough to ensure that all ingredients are well incorporated and the dough is smooth and uniform.
Throughout this process, consider your environment. Kneading on a lightly floured surface helps prevent sticking, but be cautious not to add excessive flour, as this can weigh down your dough. Each knead presents an opportunity to refine your technique, and as you grow more comfortable, you’ll begin to notice how subtle adjustments can significantly impact the final outcome.
Resting the Dough for Enhanced Texture
Allowing the dough a moment to rest is a step that should never be overlooked. This resting period facilitates the gluten to relax, making it easier to shape later on. It’s a time to pause and appreciate the process, enabling the flavours to meld and the dough to become more manageable for subsequent steps.
During this time, consider preparing your workspace, perhaps by laying out a floured surface for shaping the gnocchi. This level of preparation not only boosts your efficiency but also underscores the importance of being organised and thoughtful throughout the cooking process.
Shaping Gnocchi with Precision and Care
To shape the gnocchi, roll the rested dough into long ropes approximately 1.5 cm thick. Use a sharp knife or a dough cutter to slice the ropes into small, bite-sized pieces, typically around 2 cm in length. Ensuring that each piece maintains a uniform size is crucial for even cooking, which is essential for both the overall presentation and texture of your dish.
After cutting, you can utilise a fork or a gnocchi board to create ridges on each piece. These ridges serve a significant purpose: they entice the sauce to cling to the gnocchi, thereby enhancing the overall flavour of the dish. This technique is deeply ingrained in many Italian kitchens, reflecting the rich culinary traditions that have shaped gnocchi-making practices through the ages.
Perfecting the Gnocchi Shape for Maximum Enjoyment
Rolling Out the Dough for Gnocchi Creation
With the dough prepared, the next step involves rolling it out into long ropes on a floured surface. This step is crucial in making homemade gnocchi easily, as the thickness of the ropes will dictate the final shape of your gnocchi. Maintaining a consistent thickness is vital to ensure even cooking. The act of rolling can be quite therapeutic, allowing you to connect with the ingredients as they evolve into something delicious.
As you roll, ensure that your work area and hands are lightly floured. This will prevent the dough from sticking and facilitate a smoother rolling experience. Various cultures worldwide have their adaptations of rolling techniques, often influenced by local customs and available tools. Embrace this moment to appreciate the global tapestry of culinary traditions, each contributing its unique flair to the art of gnocchi-making.
Cutting the Gnocchi with Precision and Care
Once you’ve successfully rolled the dough into long ropes, it’s time to cut them into small, bite-sized pieces. The traditional size is about 2 cm, but feel free to adjust according to your personal preference. This step is as much about practicality as it is about creativity, allowing you to showcase your style in the kitchen.
Using a sharp knife, cut the ropes with a firm motion to ensure clean cuts, preventing any tearing. Consistency in size is essential, as all pieces will require the same amount of time to cook to tenderness. This attention to detail can elevate your dish, making it visually appealing when presented.
Shaping the Gnocchi for Optimal Sauce Cling
After cutting, each piece of gnocchi can be shaped to perfection. Using a fork or a gnocchi board, gently press down on each piece to create ridges. This classic technique not only adds a decorative touch but also enhances the overall texture and flavour of your gnocchi. The ridges are crucial, as they catch sauces beautifully, allowing every bite to be an exquisite experience.
While shaping, consider the cultural significance of gnocchi across different regions. From Italy to Brazil, each country has its method of shaping and serving this beloved dish. Recognising these differences allows you to appreciate the rich history surrounding gnocchi-making and the shared joy it brings to diverse culinary traditions.
Cooking Gnocchi for Achieving Perfect Texture
The final step in shaping your gnocchi is boiling them to perfection. In a large pot, bring salted water to a vigorous boil. This step is essential, as the salt enhances the flavour of the gnocchi during cooking. Once boiling, gently drop the shaped gnocchi into the water in small batches to avoid overcrowding, which can lead to uneven cooking.
As the gnocchi cook, they will begin to float to the surface, indicating they are ready. This visual cue signifies successful cooking, as floating gnocchi means they have achieved the ideal texture—light and airy. Utilize a slotted spoon to remove them from the pot, allowing excess water to drain before serving. This process connects you to the ancient culinary practice of cooking, celebrating the craftsmanship and joy of creating something truly special.
Cooking Your Gnocchi to Flawless Perfection
Preparing the Boiling Water for Gnocchi Cooking
The secret to perfectly cooked gnocchi lies in the temperature of the boiling water. Begin by filling a large pot with water, ensuring there’s ample space for the gnocchi to move freely during cooking. Adding a generous amount of salt is crucial; it enhances the flavour and imparts a delightful taste to the gnocchi. This fundamental step is a hallmark of traditional Italian cooking, where the significance of salted water cannot be understated.
Bring the water to a vigorous boil, maintaining a high temperature throughout the cooking process. A common mistake is adding too many gnocchi at once, which can lower the water’s temperature and lead to uneven cooking. Take your time and work in batches to ensure that each gnocchi is cooked to perfection, retaining its lightness and delicate texture.
Timing the Cooking Process for Ideal Results
Once you’ve added the gnocchi to the boiling water, it’s crucial to monitor their cooking time closely. As they cook, they will start to float to the surface, indicating they are ready to be removed. This cooking process typically takes between 2 to 4 minutes, depending on the size of your gnocchi and the water temperature.
Timing is critical; overcooked gnocchi can become mushy and lose their delightful texture. Setting a timer can be very beneficial, allowing you to focus on other elements of your meal while ensuring the gnocchi is cooked perfectly. As soon as they float, use a slotted spoon to carefully lift them out, ensuring they maintain their shape and integrity.
Effective Drainage of Gnocchi Post-Cooking
After boiling, it’s vital to drain the gnocchi properly. Using a slotted spoon, carefully transfer them to a colander, allowing any excess water to escape. This step is essential, as excess moisture can dilute the flavour and impact the sauce you choose to accompany your gnocchi.
As you drain the gnocchi, consider the various sauces and toppings you may wish to incorporate. The goal is to enhance the natural flavour of the gnocchi rather than overwhelm it. Properly draining ensures that the sauce adheres beautifully, creating a harmonious dish that celebrates the craftsmanship behind making homemade gnocchi easily.
Delicious Serving Ideas for Gnocchi
Creating a Simple Yet Flavourful Sauce
The beauty of gnocchi lies in its versatility, and a simple sauce can elevate your dish to new heights. Tossing the cooked gnocchi with a basic tomato sauce or a rich butter sauce can create a quick and delectable meal. Both options allow the delicate flavour of the gnocchi to shine through, ensuring a satisfying culinary experience that showcases the quality of your ingredients.
For a basic tomato sauce, simmer crushed tomatoes with garlic, olive oil, and fresh herbs like basil or oregano. The result is a vibrant, fresh sauce that pairs beautifully with the tender gnocchi. Alternatively, for a butter sauce, melting high-quality butter with a touch of sage creates a nutty, aromatic dressing that complements the dish perfectly, enhancing the overall flavour profile.
Elevating Gnocchi with Homemade Basil Pesto
For a burst of fresh flavour, elevate your gnocchi with a homemade basil pesto. This vibrant green sauce, crafted from fresh basil, garlic, pine nuts, Parmesan cheese, and olive oil, adds delightful depth to your dish. The nuttiness of the pine nuts combined with the brightness of the basil creates a wonderful contrast against the soft, pillowy gnocchi.
Pesto can be prepared in a food processor or by hand, depending on your preference and the desired texture. Making your pesto allows for customization and experimentation with different nuts or herbs to create a unique flavour profile. Consider adding sun-dried tomatoes or spinach for an extra twist that reflects your culinary creativity and personal taste.
Finishing Touches with Cheese to Elevate Flavour
The final touches can make a world of difference in your gnocchi dish. Sprinkling freshly grated Parmesan cheese or crumbled gorgonzola on top adds a rich, salty flavour that enhances the overall taste. The creaminess of the cheese complements the soft texture of the gnocchi, creating a delightful balance that enhances the dining experience.
For an elegant finish, consider drizzling high-quality extra virgin olive oil or sprinkling fresh herbs over the dish. This not only elevates the flavour but also adds a vibrant pop of colour, making your dish visually appealing. Embrace the artistry of plating, as the presentation can be just as essential as the flavour, beautifully celebrating your culinary journey.
Storing and Freezing Gnocchi for Future Enjoyment
Short-Term Storage of Uncooked Gnocchi
If you plan to savour your uncooked gnocchi later, you can store them in the refrigerator for up to a day. To prevent sticking, arrange them in a single layer on a floured tray or plate, ensuring they do not touch each other. Cover them with a clean kitchen towel or plastic wrap to shield them from drying out.
This short-term storage method allows you to prepare ahead of time without compromising the quality or texture of your gnocchi. In various culinary traditions, preparing gnocchi in advance is common practice, allowing for a more leisurely cooking experience on the day of serving.
Freezing Uncooked Gnocchi for Long-Term Enjoyment
For long-term storage, freezing is the most effective option. To freeze uncooked gnocchi, place them on a floured tray in a single layer. Once frozen solid, transfer them to a zip-top bag or an airtight container to maximise their shelf life. This method prevents them from sticking together and ensures they maintain their shape and texture when cooked later.
When you’re ready to enjoy your frozen gnocchi, there’s no need to thaw them; simply drop them directly into boiling water straight from the freezer. This quick cooking method provides a convenient meal option while allowing you to savour the delightful experience of homemade gnocchi.
Storing Cooked Gnocchi for Later Enjoyment
If you have cooked gnocchi that you’d like to store, place them in an airtight container in the refrigerator. They can remain fresh for up to three days. To maintain their quality, consider adding a drizzle of olive oil to prevent sticking, ensuring they stay delicious until you’re ready to indulge again.
Gently reheating cooked gnocchi can be done in a pan with a touch of sauce or butter to restore their original texture. This practice embodies the idea of wasting nothing, fostering a spirit of sustainability in your culinary endeavours. By taking the time to store and reheat your gnocchi properly, you ensure that every bite remains as delightful as the first.
Frequently Asked Questions Regarding Gnocchi Preparation
What Types of Potatoes Are Best for Crafting Gnocchi?
Starchy potatoes, such as Russets or Yukon Golds, are ideal for making gnocchi due to their high starch content, yielding a light, fluffy texture essential for great gnocchi.
Is It Feasible to Make Gnocchi Without Eggs?
Yes, you can make gnocchi without eggs by utilising substitutes like flaxseed meal or aquafaba. However, be aware that the texture may differ slightly from the traditional recipe, which typically includes eggs.
How Can I Determine When Gnocchi Are Fully Cooked?
Gnocchi are generally cooked when they float to the surface of the boiling water, which usually occurs within 2 to 4 minutes, depending on their size and the temperature of the water.
Can I Freeze Uncooked Gnocchi for Later Use?
Yes, you can freeze uncooked gnocchi. Start by placing them in a single layer on a floured tray, then freeze them solid. Next, transfer them to a zip-top bag for long-term storage.
What Is the Best Approach to Store Leftover Cooked Gnocchi?
Store cooked gnocchi in an airtight container in the refrigerator for up to three days. Adding a drizzle of olive oil can help prevent sticking and maintain their quality.
What Sauces Complement Gnocchi Delightfully?
Gnocchi pairs wonderfully with a variety of sauces, including a simple tomato sauce, creamy butter sauce, and vibrant basil pesto, each enhancing the delightful flavour of the gnocchi.
What Is the Best Technique for Shaping Gnocchi Accurately?
To shape gnocchi, roll the dough into long ropes, cut them into bite-sized pieces, and use a fork or gnocchi board to create ridges that help sauce cling to the surface.
Can I Prepare Gnocchi Ahead of Time?
You can prepare gnocchi in advance and store them in the refrigerator for up to a day or freeze them for longer-term storage, making meal prep easy and efficient.
Why Should Potatoes Be Boiled While Unpeeled?
Boiling potatoes unpeeled helps retain moisture, resulting in a fluffier texture, which is crucial for achieving light and airy gnocchi that are a delight to consume.
What Is the Best Method to Reheat Gnocchi?
Gently reheat cooked gnocchi in a pan with a bit of sauce or butter to restore their texture and flavour before serving, ensuring they taste just as delightful as when freshly made.
Join us on Facebook for the latest updates!
The post How to Make Homemade Gnocchi Easily: A Simple Guide appeared first on https://cookinggods.com
The Article Homemade Gnocchi Made Easy: Your Simple Guide Was Found On https://limitsofstrategy.com